I have been using AWS Free Tier and Google Cloud Platform Free Tier for some hobby projects of mine, and even used AWS Activate for one Startup I was involved in. I love free cloud stuff.
Recently, I discovered Oracle Cloud Free (Forever) Tier and immediately fell in love with it. At first, I was skeptical about how generous they are about the services they provided for free, that too, for an unlimited time. Let’s look at the Always Free Infrastructure they provide –
- 2 AMD based Compute VMs with 1/8 OCPU** and 1 GB memory each
- 4 Arm-based Ampere A1 cores and 24 GB of memory usable as one VM or up to 4 VMs
- 2 Block Volumes Storage, 200 GB total
- 10 GB Object Storage – Standard
- 10 GB Object Storage – Infrequent Access
- 10 GB Archive Storage
Although Ampere A1’s computing power might not be as powerful as AMD’s or Intel’s, 4 cores and 24GB of memory, absolutely free of costs is just too awesome to be true, but it is. What more free stuff could you ask for? In fact, I am currently using OCI Ampere A1 instance to host my personal website (WordPress) and I’ll be showing how I set up the server and WordPress site from start to end on this post.
Note: You need a credit card to create an account.
Here’s the step to launch a new instance
1. Create an account and log in to the dashboard.
2. On the dashboard, you will see a bunch of Quickstart menu to help you deploy some common applications.
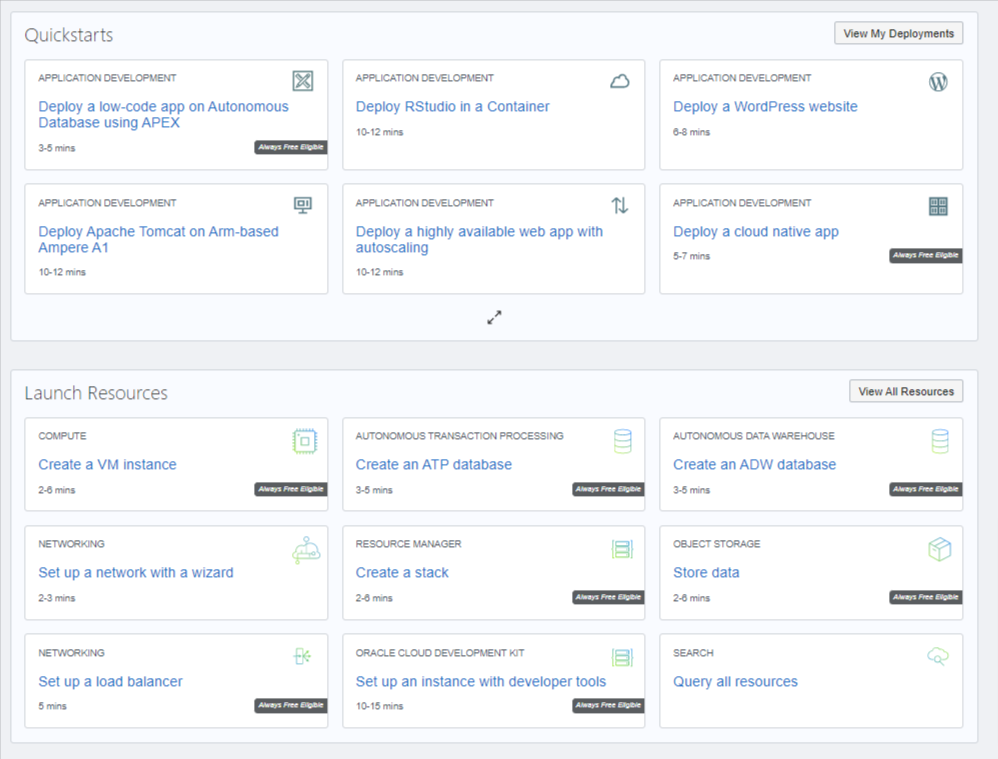
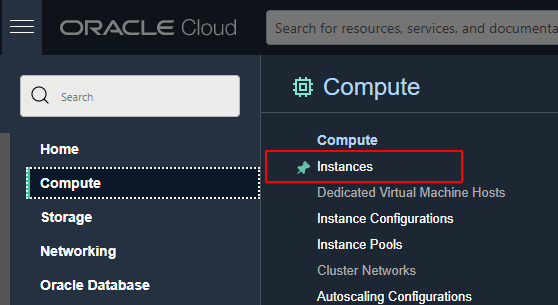
3. To launch an Ampere A1 instance, you can use either the Quickstart option called Create a VM Instance under Launch Resources or the Instances link from the hamburger menu as shown on the image below. Then, click on Create an Instance button.
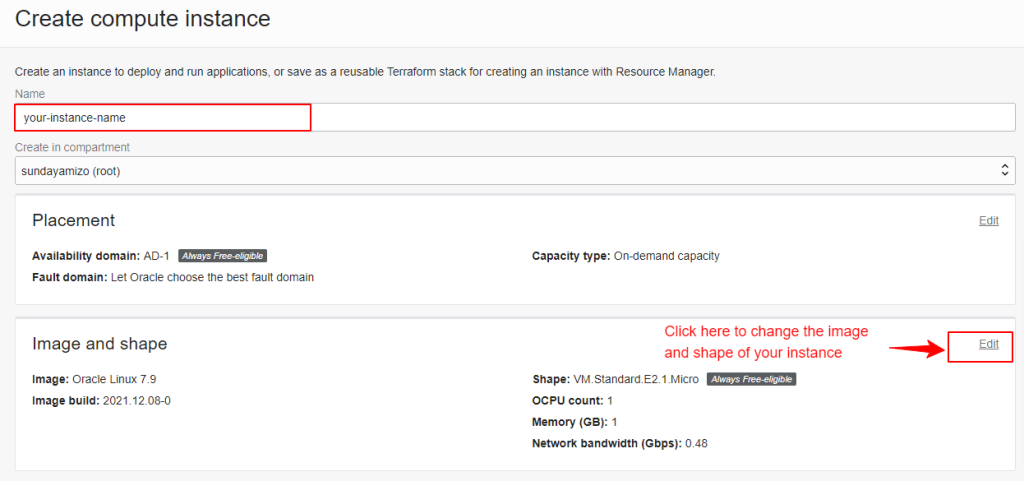
4. You will see the launch panel where you can choose the image type, shape, etc.
5. You can write your desired name for the instance or use the default name given. Leave the Placement as it is.
6. To change the instance image and shape, click on Edit as shown in the image below.
7. Click on Change Image and select your desired image. Remember to check for the Always Free-eligible label. I am using Oracle Linux Version 8.

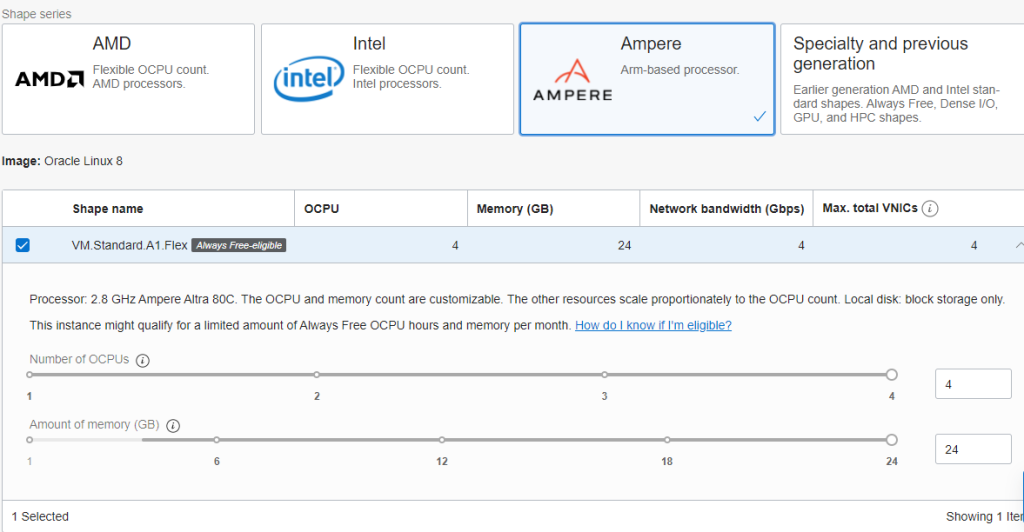
8. Similarly, click on Change Shape and select your desired Shape. I am using Ampere VM.Standard.A1.Flex and change the number of OCPU and Memory to their maximum always free capacity i.e. 4 CPUs and 24GB memory.
9. You will need to add an SSH key pair to connect to your instance later. To do that you can either save the Private and Public key autogenerated or you can use Putty to generate a key pair for Windows users. Don’t forget to store these keys safely as it will be the only way you can access your instance.
10. For Boot volume size, you can specify the size up to 200GB (Always Free limit) or use the default size 46GB.
11. Leave the rest as default and click Create.
You will need to wait some time while the instance is being provisioned for you.
Accessing your instance
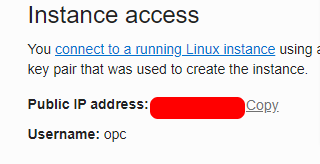
Once the instance is running, we can now connect to the instance using the key pair we saved/generated earlier. You can find the Public IP address and Username under the Instance information tab. You can read more about how to connect to a remote server using PuTTy here.
At this point, you will be able to do pretty much anything that is possible to do on your selected instance. There are many ways you can set up a WordPress site, but, we’ll see how you can do it using aaPanel – a free VPS control panel.
Installing aaPanel
I will assume you are using Oracle Linux as your OS. Some commands used might not be compatible with your OS. So, change it accordingly.
Once you logged into your server, run the commands below:
sudo -i
Update your server:
yum update -y
Install aaPanel:
yum install -y wget && wget -O install.sh http://www.aapanel.com/script/install_6.0_en.sh && bash install.sh
Once the installation is done, you will see some message on your terminal something like this –
Congratulations! Installed successfully!aaPanel Internet Address: http://123.456.789.6:8888/e6213d0a8 aaPanel Internal Address: http://10.0.0.212:8888/e6213d0a8 username: 1wehccml password: ec210bbfWarning: If you cannot access the panel, release the following port (8888|888|80|443|20|21) in the security group
Copy this information and store it safely.
As you can see on the message, you will need to open access to some ports that are required for aaPanel to work smoothly. To do that, go to your instance dashboard, under Instance details click on the Virtual cloud network. You will see the VCN details and its subnets. Click on the available subnet.
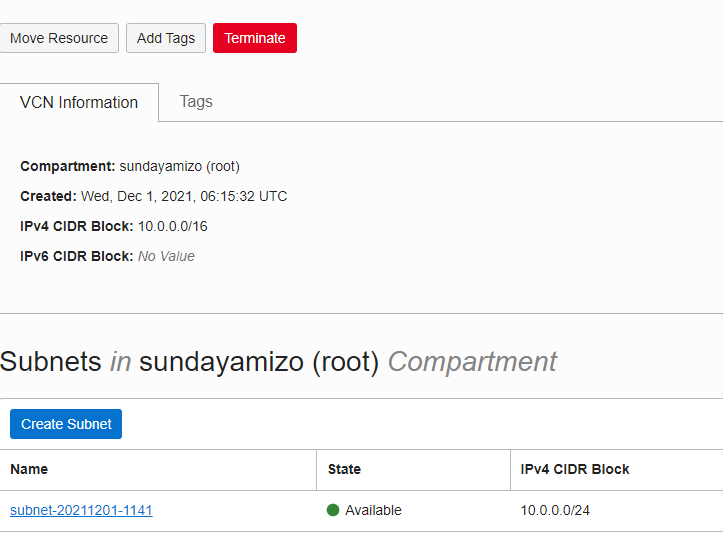
Now, you will see the subnet details and its security lists. Go to the available security list.
Click on Add Ingress Rule button, and fill it up as below –
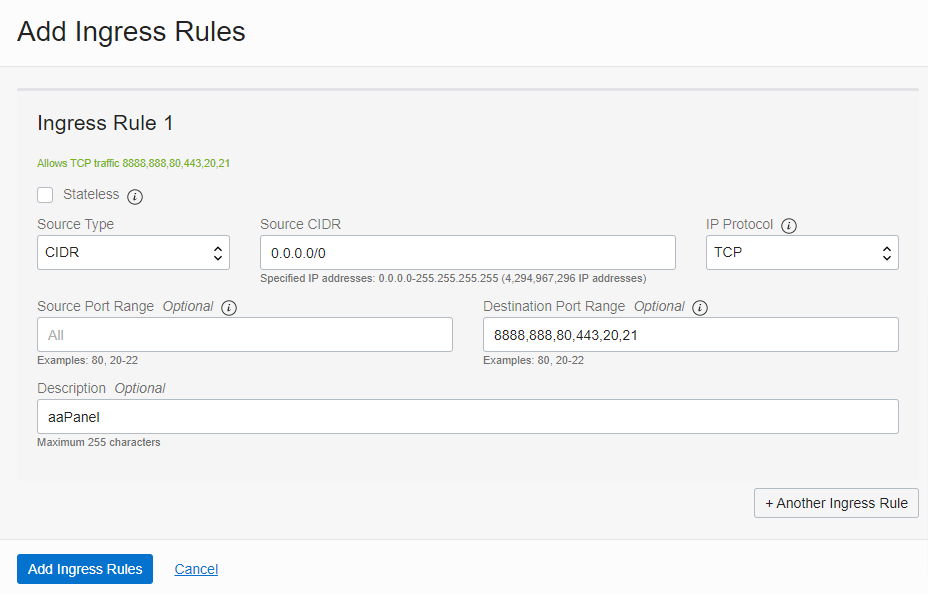
Once you add these rules, you will now be able to access your aaPanel through the aaPanel Internet Address shown on the message that you saved earlier. Use the username and password to log in to the dashboard.
Adding Site
aaPanel is pretty much like any other control panel. You’ll need to install PHP, MySQL, Apache or Nginx, phpMyAdmin, etc. depending on your requirement. For my WordPress site, I am using Apache 2.4.51, MySQL 5.7.34, PHP v8.0, and phpMyAdmin 5.0.
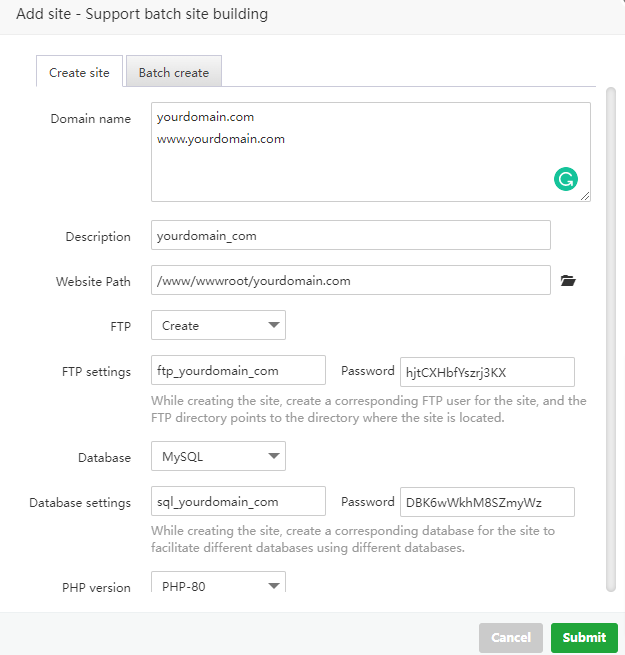
To add a site, go to Website on the right sidebar. Click on Add Site. Fill up the fields as below. Note that you can change the username, database names, and passwords. But, make sure to remember them.
Also, add an A record pointing to your server IP on your DNS Management. After this, you will be able to access your site.
Installing WordPress
To install WordPress, go to Files on the right sidebar menu, and go to the folder named after your newly added domain. Delete all existing files. Click on Remote download on the top bar of the file manager, and add this URL : https://wordpress.org/latest.zip to the URL address field, and click Confirm.
Now, wait for the file to finish downloading. Once it’s done, you will see the latest.zip file on the file manager. Move your cursor over it, and you will see an option to Unzip the file, and click on that. Once the unzip process is done, you will see a folder named wordpress, go inside it and select all the files. Use the Cut option to cut and go back to your website’s root folder. Right-click anywhere, and use the Paste option to paste the files.
Open your website again, and you will now see the WordPress installation wizard. From this point, it’s just the same old WordPress installation process. For database usernames and passwords, use the same details that you provided while installing MySQL.
Of course, there are other server control panels out there. But, aaPanel seems to be most compatible with Ampere A1’s CPU amongst the free control panels. Although it’s not the best, it still suffices my basic requirements.
Hope you find this useful.